Spyder Cameras Instructions
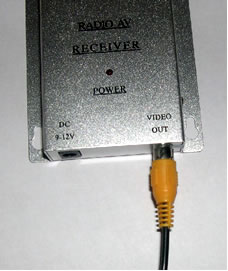
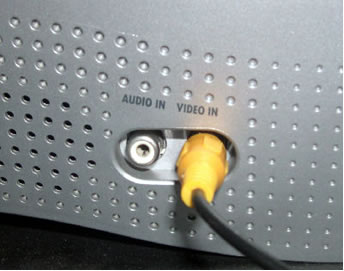
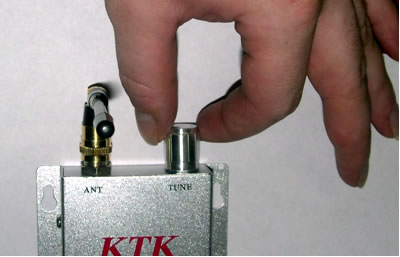
Make certain that the antenna is screwed onto the receiver unit. Connect the RCA cable to the receivers “Video Out” and your TV’s or VCR’s “Video In” plug. Usually this plug will be yellow in color. Both ends of the RCA cable are identical and it doesn’t matter which end you use.
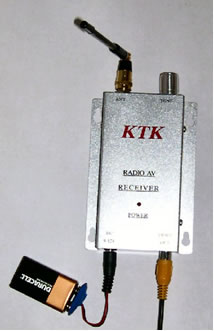
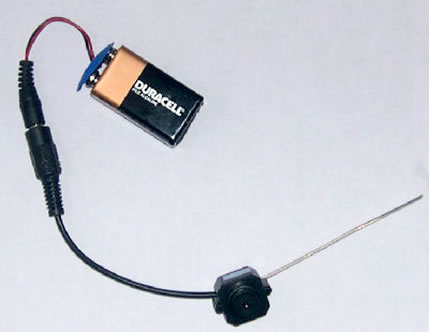
Using the battery adapters, power both the camera and the receiver unit with new high-quality 9 volt batteries. A single 9 volt battery should power the receiver unit for approximately 8 hours. The camera may become warm, as it has no internal fan. This is normal. The battery and battery adapter can be replaced with a 12 volt wall adapter. A wall adapter should have an amperage of no more than 250mA.
Turn your TV to channel 3 (most cases), or the "video input" channel. The frequency adjustment knob on the receiver can be changed either turning it left or right to get the best picture. It’s very similar to tuning in an old radio. Adjust it till you get a quality picture. If you’re not getting a picture, then either you need better batteries or you haven’t connected the receiver properly.
If you’re trying to record on a VCR, it is critical that you switch to your VCR's video input so that you record the image from the camera and not a TV show. To do this, some VCRs have a button on the remote, others use a on-screen menu, or it could be a switch on the front panel. You won't be able to buy a camera with audio, since it is a Federal Law that only makes it available to law enforcement agencies. SummariesSetting up the Camera1. Place the camera and transmitter in desired location. Setting up the receiver 1. Place receiver in desired location. Connecting the receiver to your VCR 1. Connect your VCR to you TV as usual. Viewing live with your TV 1. Make sure the cable is connected correctly first. Recording with your VCR 1. It is critical that you switch to your VCR's video input so that
you record the image from the camera and not a TV show. |


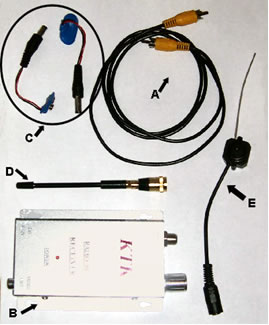 A)
RCA Cable
A)
RCA Cable